Showing posts with label Sources. Show all posts

Friday, February 3, 2017

Remodel Progress & Product Sources


Happy Friday friends! We are still waist deep in remodeling two bedrooms and the jack & jill bathroom, but I can see the light! This weekend we plan to tackle the floor in the red room (we will be using this process again) and I cannot wait to see the space transform with white plank floors. I painted the sub floor white, so that if there are spaces b/w the planks, the wood color won't show through (something I should have done for the black floors in our great room!). 


We finally got all the dang wallpaper off the walls in the other guest bedroom (the one we are painting navy- we decided on BM's Hale Navy). Whit tried his hand at skim coating, and it worked fabulously! It was actually a quick and easy process(by that I mean it took him two nights after work). Tonight we are going to move all the $h!t out of that room, tape off windows, lights etc... and paint the trim glossy white!


This is why the old carpet had to go.... I mean... This is what any old carpet looks like, which is why you should rip it out!
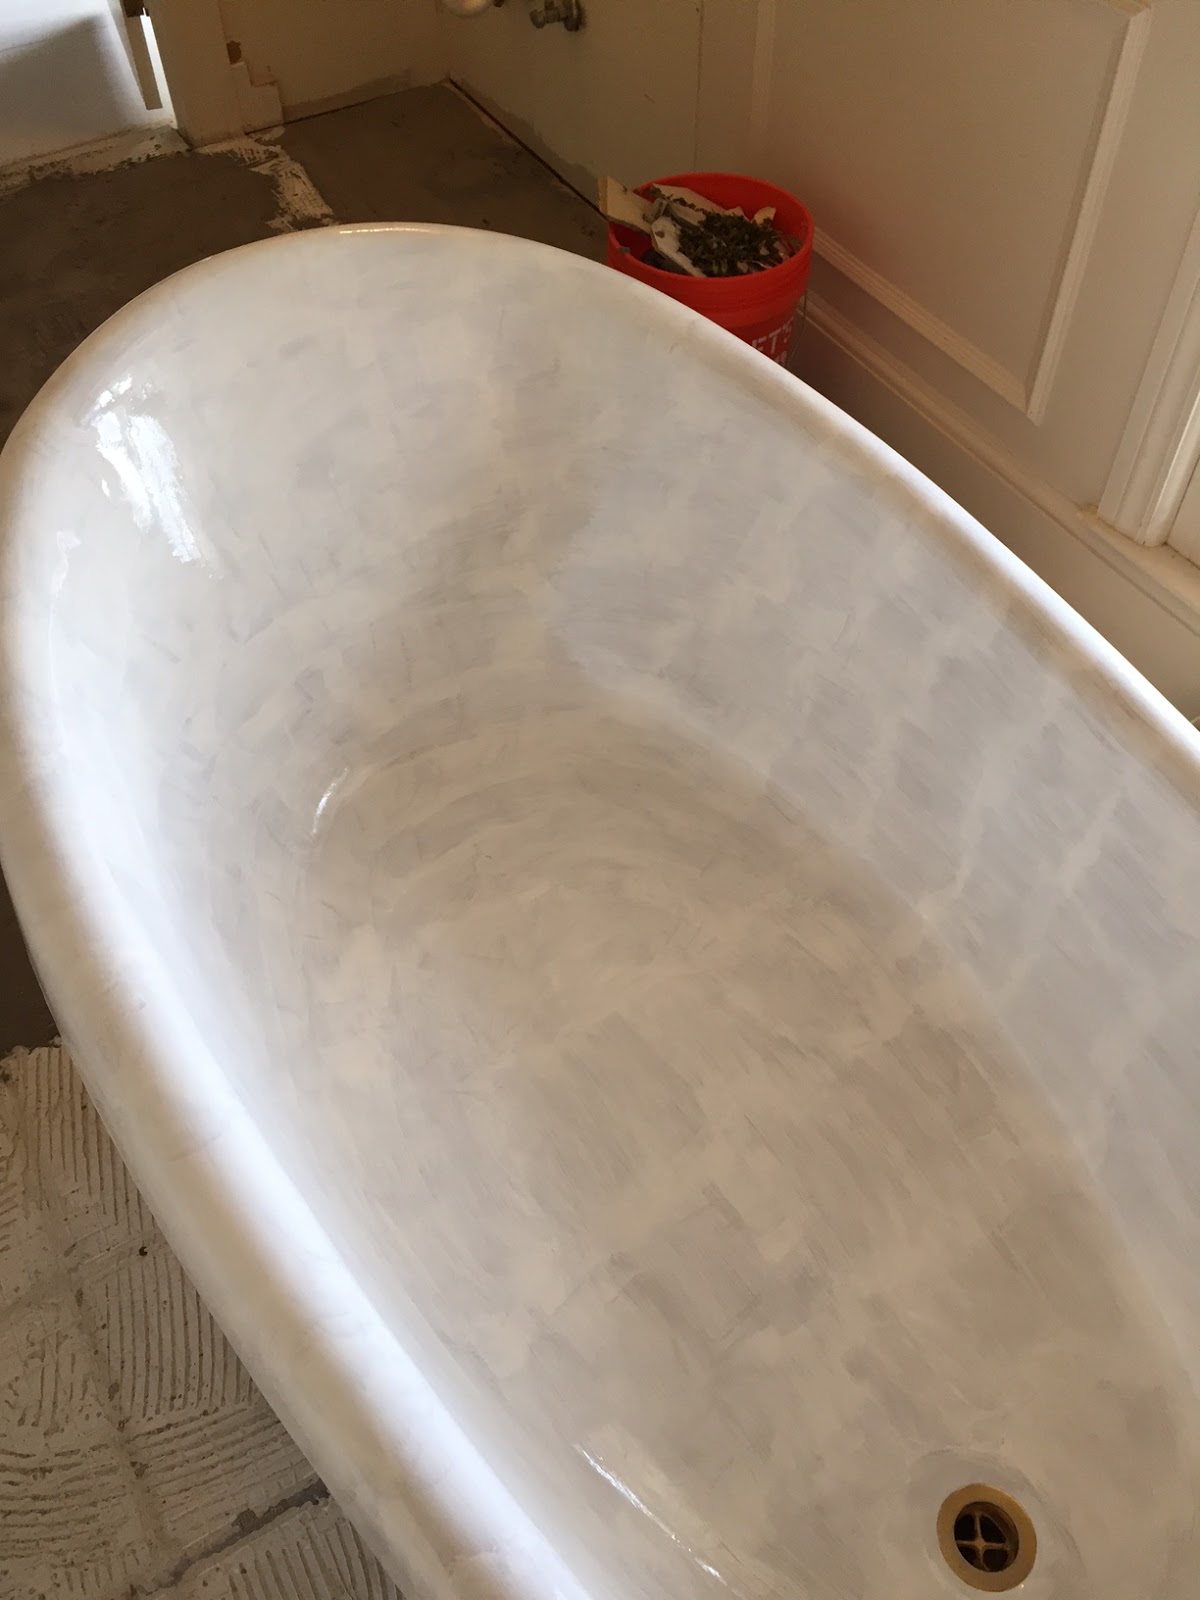

For the tub in the bathroom- the biscuit color had to go- so I refinished our tub! Yes, you do NOT have to hire someone to redo your bathroom, just get this awesome product and go to town! 


(my thighs do touch, this pic is an amazing optical illusion)


They make a chip repair kit, a brush on version, and a spray on application! I liked the brush, as I was more in control- but a spray may be good for a shower? Just be sure to follow their instructions and safety guidelines carefully! I also watched this video which helped- I recommend reading the instructions twice and watching the video twice to make sure you completely follow all the steps. 


I still have to do two more coats, but wanted to share the progress. I am undecided on if I want the base to be black or white?!


This vanity (two of them) are what we will install after the tile. They have legs and a bottom shelf that they will sit on, and I simply cannot wait to have these pretties installed. I will be honest though, it kind of felt dirty buying something brand spankin new??? Like a little piece of me died since I didn't find these on the side of the road or at the thrift store, ha! We picked both of them up for 40% off! I do not plan to keep the faucet or hardware. I have these faucets in my amazon basket RN- and I am in love. 


Can't wait to decorate these puppies with some succulents and yummy smelling soap!


Thinking this light fixture, but in polished chrome for the bathroom? IDK yet. I am waiting to decide finishing touches until the tile and walls and vanity's are finished. 


We decided on this tile, with gray grout (pictured above) I highly suggest going online or to a Floor & Decor store for tile or counter tops- their prices and quality cannot be beat!


This precious penny tile was a close second...  


I thought these long white tiles were super cool- would be awesome as a backsplash in a herringbone pattern- if you had a large wall space to cover. Hmm... I may have to re-redo our kitchen... 


For the red room- these are the twin beds I purchased from a local antique store- Hodgepodge Antiques. They were $425 for both- which is a ton of money (IMO). They are federal style with barley twist spindles, and I think the are just the coolest things ever.  Online, similar beds go for like $1000+  and the ones I purchased are in MINT condition. A little tip my instabestie Meg Hall gave me on buying antique furniture, or anything used for that matter- check out how much it would be to buy the same thing new! Similar wooden twin beds, like here, are more expensive for just one bed than what I paid for both! Duh!


I have been wanting to stop into a local lamp store for awhile now, and I finally did and died & went to heaven. The store is called Southern Shades, and it was amazing! They had the coolest freaking lamps ever, they were pricey, but they have a sale right now, and I can't get this beauty off my mind... They are actually priced just fine, it is just that I am cheap. I do plan on taking him a few lamps I have now and having shades made for the lamps- after visiting this store I am never buying lamp shades for a box store again! I need like 5 promotions though before I stop buying lamps from thrift stores, lol. 


Not really related, but I bought six black shades with gold liners for our kitchen chandelier, as it was just too bright, and the lamp shades are made in Meridian, MS! They are truly southern shades y'all :).


Speaking of local, I am in the process of washing our set of  Red Land Cotton classic hemstitched twin sheets. Red Land Cotton is a cotton farm right here in North Alabama. The USA made, 100% cotton bed sheets are literally the best thing ever. We have partnered with them on the twin beds after buying their king hemstitch sheets for our bedroom. I cannot wait to photograph the sheets on the beds in the finished bedroom. Our guests are so lucky they will be able to sleep on these puppies! Splurging a bit on sheets that will last forever, and are super soft, are totally worth it. They continue to offer more and more products that are made from their cotton & offer 15% off if you sign up for their newsletter! Duh!! Be sure to check them out!


I never keep the bows, but this black and white is just too good!


And because no matter what stage in life I will be in, I will always love IKEA. Sure, some of their stuff is cheap and crappy, but there are things from there that I think are way affordable and super durable. 


Like the Ritva curtain, the Racka rod, Entreratt finials and Betydlig wall/ceiling kit. The curtains are sold in packs of two, and they made them 118" long, which is perfect for our house- short curtains are literally the worst. IDK why most stores only carry 85" curtains??


I use black non-stick hangers for our clothes, but in our coat closet and guest bedrooms, I like to have wooden hangers available. Kind of hotel-ish. $5/pack. 


Ikea has bomb.com baskets- I plant to stick a tall plant in this one, and have it in one of the bedrooms. 


... Our entryway... currently. I am actually kind of a clean/neat freak, so this definitely makes me a bit crazy, but I just have to mentally block it out, because I know it is only temporary!

You guys- have a fabulous weekend and hopefully very soon I will be able to share "after" photos of at least one of the three rooms we are working on :) 

Thanks for reading, as always! 

EJ 


Wednesday, December 28, 2016

The Pantry & Coat Closet: Before & After


So, I may not have made ANY progress on getting the guest bedroom(s) fixed up- but we did get out pantry/coat closet all fixed up and fancy! The space before we did this was just a really long closet that was extremely disgusting. The house, remind you, was abandoned for well over a year. This closet had musty green carpeting, painted over wallpaper and rusty white shelving. The light bulb was just that, and so it was really just an unusable space. The whole story on this is that we hosted a Christmas party at our house and I wanted a place for people to hang their coats.... loads of money, time & labor later... we were able to do just that! (the coat closet is on the other side of the pantry)

Before


The fist time I looked at this house, I knew I wanted to revive this space and use it like a pantry/kitchen storage area. Our kitchen really doesn't have that much cabinet space + I have glass shelves, so I needed a place to hold all of Whit's kitchen gadgets and our Costco trip hoards. My vision for this space has always been to put up ship-lap and try our hand at tiling. So, that is exactly what we did! 


We used this ship lap from Lowes and this super affordable honey comb tile. The picture of the wood shows it going vertical, but it can also be put up horizontally. The grout we used is called Avalanche- if you want a true white grout, that is the color you need. The stuff called "White" is more like a light greyish color- we know from experience- side eye emoji. Since this was our fist time tiling a floor, we looked up some YouYube videos and researched how to tile a floor- we rely on the internet for almost everything we do. We put the grout on after we put up the shiplap but before we put on the final trim baseboards.


Notice the old white and wooden doors? Very dirty up close. 


So much cutting involved... and it was cold and we are kind of lazy, so the miter saw got put to use in our entryway... just days before our party, major eeek. 


After the ship-lap was up- everything got a coat of BM's Chantilly Lace. We then put on the grout to make sure we got all the edges tiled up- and lastly added crown molding, baseboards, quarter round to match the rest of the house and added a little light fixture. This space definitely has the country house feel- which I can't really do in any other rooms as the house is too formal. So I tried my best to max it out :).


Oh yes, the shelves! We picked up some "common" board from Home Depot. It is the quality of wood that isn't the most expensive but also won't give you splinters. Like there is a sign that says "common board" in the Home Depot I put a coat of my favorite stain, Early American onto the board before cutting and hanging. The brackets? A total score from Wal-Mart. I just sprayed them flat black and we picked up some already-painted-black screws.


After


The rug was a vintage find from one of my favorite places to shop in Iowa - Sister's Garden & Bloom.Yes, that is Frank's silver food bowl- #fancy. 


Best mineral water ever. 


Cutest little cordial glasses thrifted at Salvation Army during Christmas in Iowa. I love using this product to make old glass sparkling clean! 


Whit switched out the light fixture- I chose this to install, a total School House Electric knock off. Beware, the glass looks more orange online than in person. He also replaced all of the outlets to my favorite white screw less plates. Our house has some fantastic detailing, so when we work on projects we try and make sure we do to the standards that the house was built.


I love the look of how the pine and knots show through. I used one coat of heavy duty coverage paint. It does not fully cover unfinished wood, but that was fine with me for this project. 


Frank's food canister - I love this one, as it is actually air tight, perfect for gross dog food- I hate dog food/treats etc... gross. 

The Coat Closet

The "before" pics were not taken, but it is just the backside of the pantry and was in equally rough shape. We did everything the same, and I love how this turned out! Guest coat approved :). 


The closet door is just right inside our house to the left, it is easy to miss as we usually have the door the the great room always propped open. 


If you follow my insta-stories, you will recognize that awesome vintage Wrangler vest I scored for $6. 


I am seriously wondering if we will ever need these boots again, but they do look quite nice in here. Not shown? The matching Crocs my mom bought us for Christmas...


Umbrella basket from my fav local store, Eleven54 on Wood


So glad to be done with this project, it was actually pretty time consuming- but the results are fab, and really update the house. Now, back to those dang bedrooms... maybe...

Merry Christmas // Happy Holidays // Happy New Year

XO 

EJ 


.


Wednesday, November 30, 2016

$6 Door Hack & Christmas Decor


You guys- I have a great little project for the upcoming weekend/holiday time off! And it costs almost zero dollars! If you have a local Benjamin Moore store, you can get a pint size sample of paint for $6.  I say BM store, because their sample paint, in my opinion, is a lot better quality than sample paint from a large hardware store. The sample can be tinted any color, and comes in an eggshell finish. Eggshell has a bit of a sheen, and perfect for a front or back door. I was so sick of the 1990's country living shade of green we had going on, on our front door, so the other day I picked up a paint sample in Hale Navy and went to town. That little can covered two coats on our huge front door. The Hale Navy paints on a lighter blue, but dries dark. A project for this winter or early next year will be to paint all the shutters on our house to match our front door. They are all that green that was on the front door. I am thinking Hale Navy or possibly something even darker will look really good... The point is this project is super easy and cheap and your front door makes a first impression, so make sure it looks dang good!


Our tree is in the background. We picked up a fresh one from Home Depot and decorated it with K-Mart tinsel I picked up a year ago from their going out of business sale #trashy.  The planter is stuffed with holly branches from our backyard and makes the prettiest door stop #free99. I am so glad that when our door is propped open I now see some navy goodness. 


Another "how to decorate for free" - go cut some cedar branches down and stuff them into an old wicker basket. I love the look of fresh anything, hate fake stuff, so this kind of natural decor makes me super happy. 


Updated the porch with some black and white love, but dang, that green has got to go!


Cedar shrubs purchased from Lowes have replaced the ferns (which are in our bathtub upstairs). Pine cones from the backyard cover the base of the pot and add a great touch of Christmas-y-ness.


So much light and IDK how to filter it on my camera. Oh well, I still love this door! 


Re-posting this photo again- as we had the glass replaced on the side panels, since the other stuff was being held together by tape, LOL! The plain glass lets in much more light, and definitely gave the place an updated look. We used a window replacement company here in town and it was super affordable, I should have done it sooner!

Thanks for reading, ya'll!

EJ